Well, it was really putting the brakes back on, once we’d got them off in the first place.
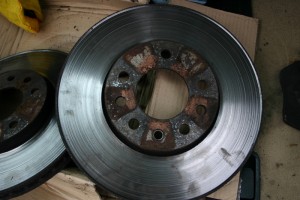
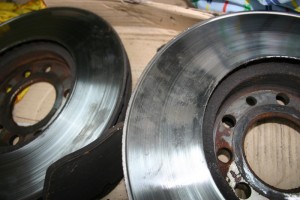
It all sounded so simple really: Change the front brake pads and disks on the Saab 9-5 Estate. The car has done over 165,000 miles and the brakes were “grooved” according to its last MOT and had started making odd scraping noises.
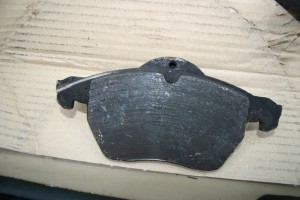
I’d worked out what the scraping noise was – it was down to the thickness of the pad material reaching the same as the depth of the wear on the disks so that the back plate of the pad caught on the original edge of the disk and scraped the rust off.
New pads and disks were ordered from Elkparts along with some new vacuum hose to fix another problem that I had. Then once that had arrived all I needed was the time and the place to do the work. My brothers driveway seemed a logical place as its flat, off the road and close to a handy source of coffee (and plasters and drills and hammers and other diverse tools). So last Saturday I headed over and we got to work.
If only! We hit our first problem within 2 minutes in that we could not get the wheels off. We had the “official” Saab wheel bolt remover but it just twisted and bent out of shape when we tried to use it.
So we hopped in the car and drove over to KarParts who are a great little indy car parts dealer, just like there used to be in the days before Halfords swamped the market. We picked up a rather nice extensible wheel wrench which came with a set of socket to fit the common wheel bolt and nut sizes.
So back to the drive and with some rather drastic cracking noises and puffs of dust we got the bolts free and once we’d jacked the car up and got the wheel off we could get to work.
Now the procedure for replacing the disks is quite simple:
- Remove the Wheel
- Remove the Brake Calliper
- Remove the Calliper mounting bracket
- Remove the disk retaining/positioning blot
- Remove the disk
Replacement is, as Haynes puts it, simply the reverse of removal.
Ha, ha ha!
So we have the wheel off, so its time to remove the Brake Calliper. This is quite easy with a 7mm allen key or driver for your socket set. But of course once you’ve taken out the two bolts the whole thing will not come off because the pads are holding the calliper in place on the disk. So you need a pair of “Pinch” pliers, or a very large pipe spanner will work quite nicely.
Using the pliers you slowly press the piston back into the cyclinder which means you then have enough room to move the calliper off the disk.
So the calliper is now off and its time to move onto the mounting bracket. This is held on by two large bolts, two large 18mm bolts. 18mm… hmm, when did you last see an 18mm socket in your socket set? 17? Certainly. 19? Certainly, 18? Well that would probably be a no I suspect. None of the socket sets my brother and I had contained an 18mm socket. So it was back in the car, my brothers this time, and another trip across town. Now do doubt you’ll be thinking “Why didn’ they just get a 18mm socket last time they were there” Well Saab changed from using 18mm bolts to using a very larg Torx headed bolt and although theoretically my MY98 car should be on 18mm some people have found torx there instead.
So we return, with an 18mm socket and a nice little wrench bar as all our socket sets use a smaller size driver, and within a couple of mintues the mounting bracket is lying on the floor.
Now all we have to do is remove the little bolt which hold the disk onto the hub. The bolt has a 5mm allen socket fitting. This should be easy but its not and the bolt is seized solid.
In a fit of madness we put everything back on and turn the car round and start on the other side. We get the wheel off and everything loose and we give up for the day and go out to the pub.
Sunday we get back to it and we get the drivers side finished off and put back together within about 90 minutes. We turn the car round again and tackle that seized bolt. We try hammering drivers into it and they bind and lock in place but strip out when you try to undo it. So we have a bolt that is “made of cheese”, well its head seems to be because drilling it out become a major pain and we drill the head off and the disk wont budge at all. We drill some more and we hit things with hammers and eventually the disk comes off. We use a cold chisel to clean up the stub of the mounting bolt and fit the new disk and put everything back in place.
By very early Sunday afternoon its all done and the car has two new front disks and pads and I take it out for a little run and everything seems to be fine. All I have to do now is brake carefully for the next couple of hundred miles to let it all bed in.
And if you want see just how bad the disks were:


As Nick said afterwards, it was actually quite enjoyable in many ways. Its a long time since either of us has done anything really major on a car, I think that was probably changing the cylinder head gasket on the parents Hillman Hunter many many moons ago, and considering how much stuff on modern cars needs very specialist tools or computers it was nice to be able to do something so “major”.
